Blender Hair Tool Tutorial - Part 01
This is a very high level tutorial of my workflow using Jose Conseco's Hair Tool for Blender.
For more in depth instructions please go to Jose's docs here: https://joseconseco.github.io/HairToolDocs_28/#hair-tool-2-for-blender-28
I am a 3DS Max user that has always been frustrated by the process of making realtime hair for games.
That is until I found Hair tool for Blender. Not being a native Blender user made this slightly tricky at first but as I already had the intention of learning Blender this seemed like a good reason to finally make that jump.
That said, for any 3D artist making realtime hair I would strongly suggest looking into Hair Tool whether you are Blender user yet or not, as it takes pretty much all of the frustration out of the process and frees you up to just focus on the creativity instead.
Also just to be clear, I have nothing to do with the creation of this tool nor do I benefit in any way from its sales.


Adjust the Curve Profile to add or remove subdivisions in both the U and V directions and also edit perpendicular curvature of the strand.
Use the Taper Curve tool to adjust the overall profile width, taper and taper falloff.
Use the Randomize Curve Tilt tool to add variation and randomness to the hair cards twist.
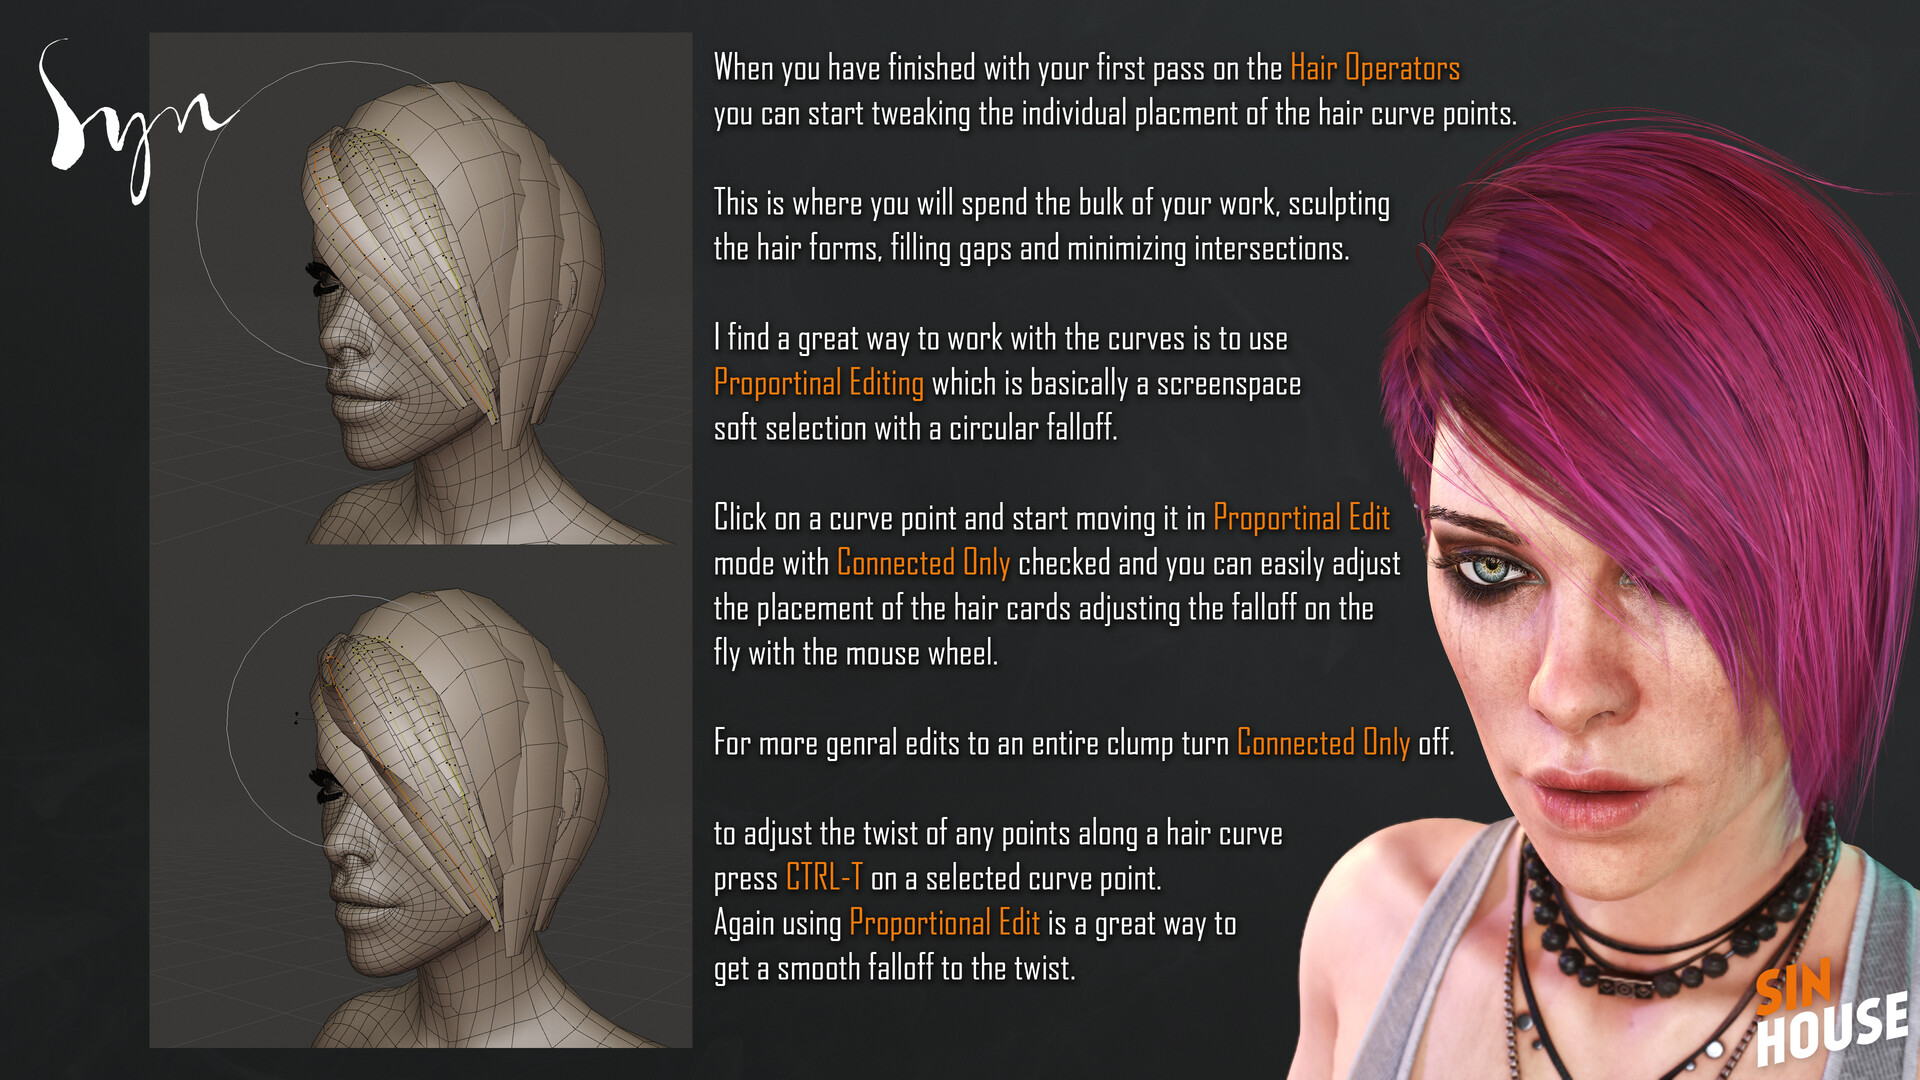
In Edit mode use proportional editing in connected only mode to tweak and sculpt the hair card placement. Scroll middle mouse to grow and shrink the fall off.
Turn off connected only for whole clump edits.


Use the Draw UVs for Hair tool to simply draw out UV boxes for your hair strands.

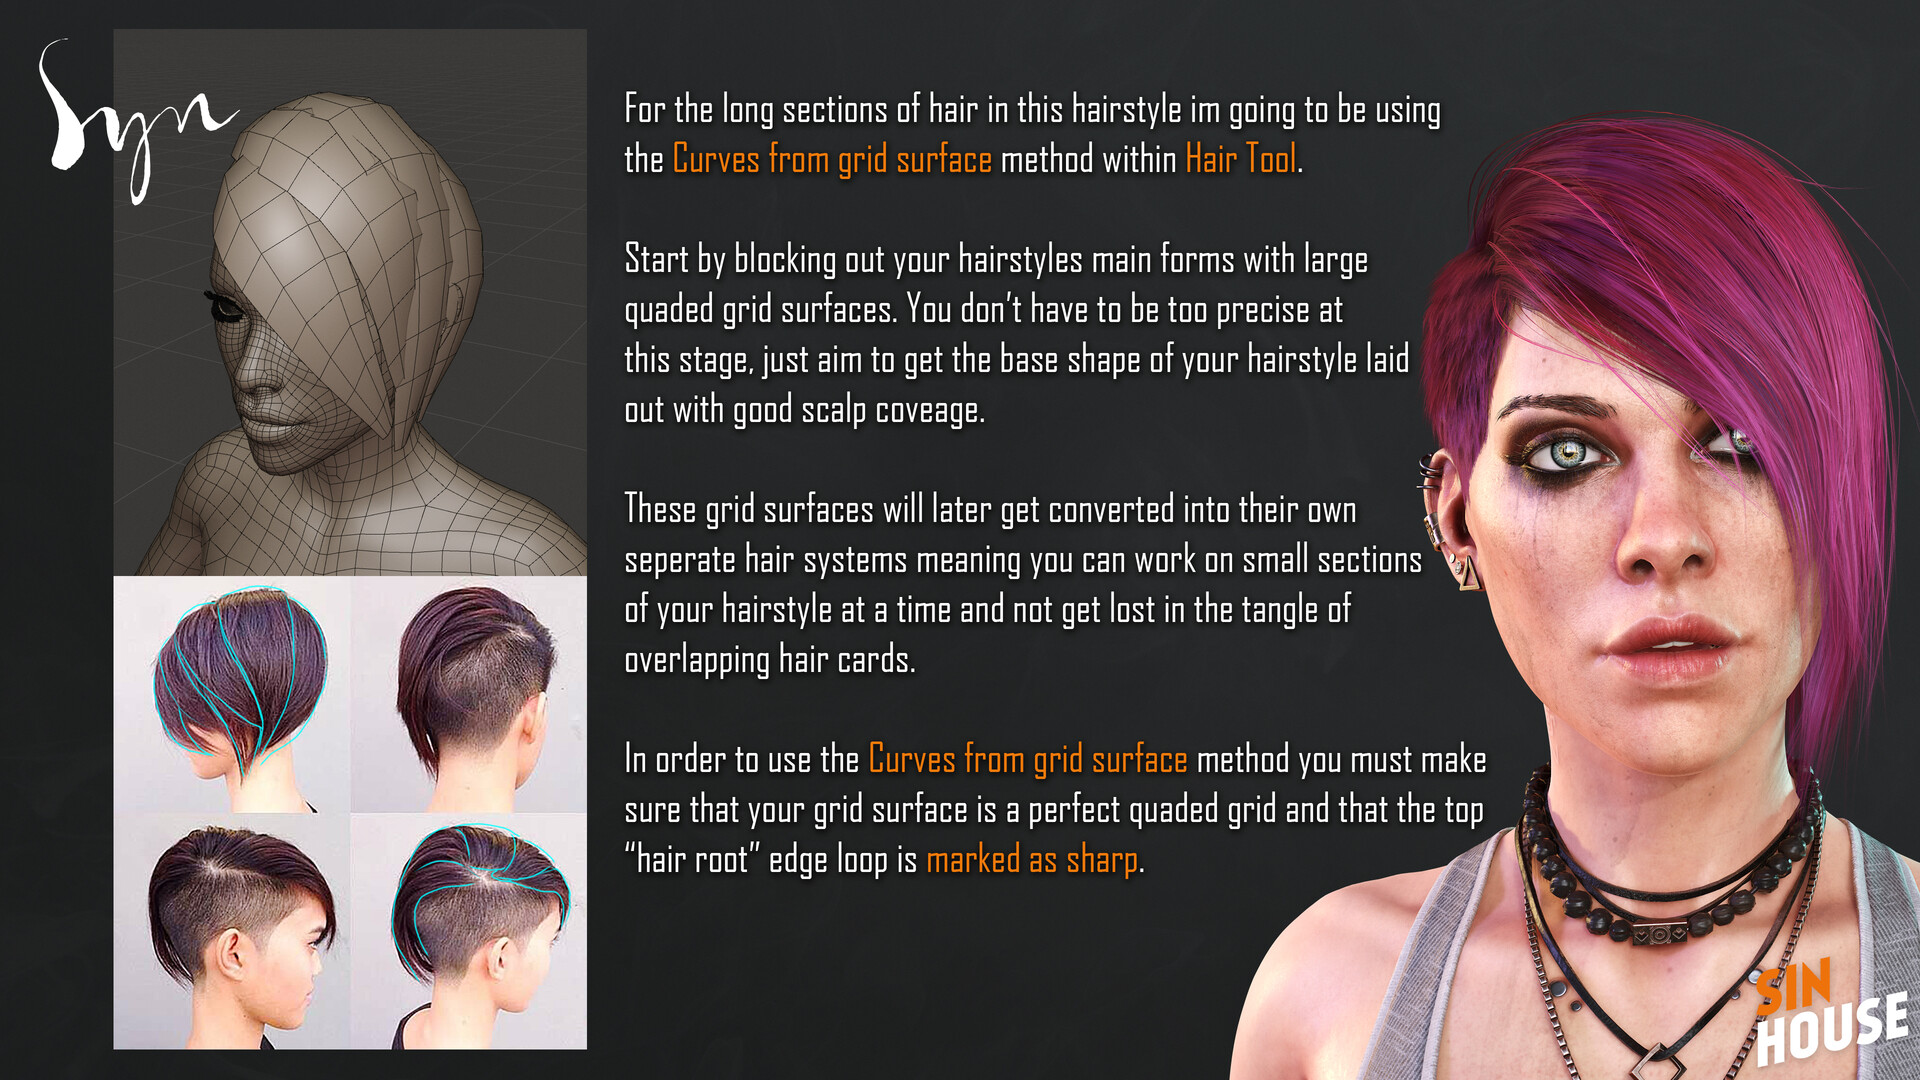
Build up the hair in layers, starting with big form dense clumps and ending with fine sparse strands.


